Although the handling of a 3d printer in general lines is simple, often the stress caused by the immediacy of a requirement, the lack of maintenance of the machine or even the lack of training of the operator can cause failures.
The most important thing in these cases is to carefully examine the failed print and try to find out what might have failed.
We have created a table to help you with identifying the causes of the failed print.
Error
You are trying to load a table of an unknown type. Probably you did not activate the addon which is required to use this table type.
You are trying to load a table of an unknown type. Probably you did not activate the addon which is required to use this table type.
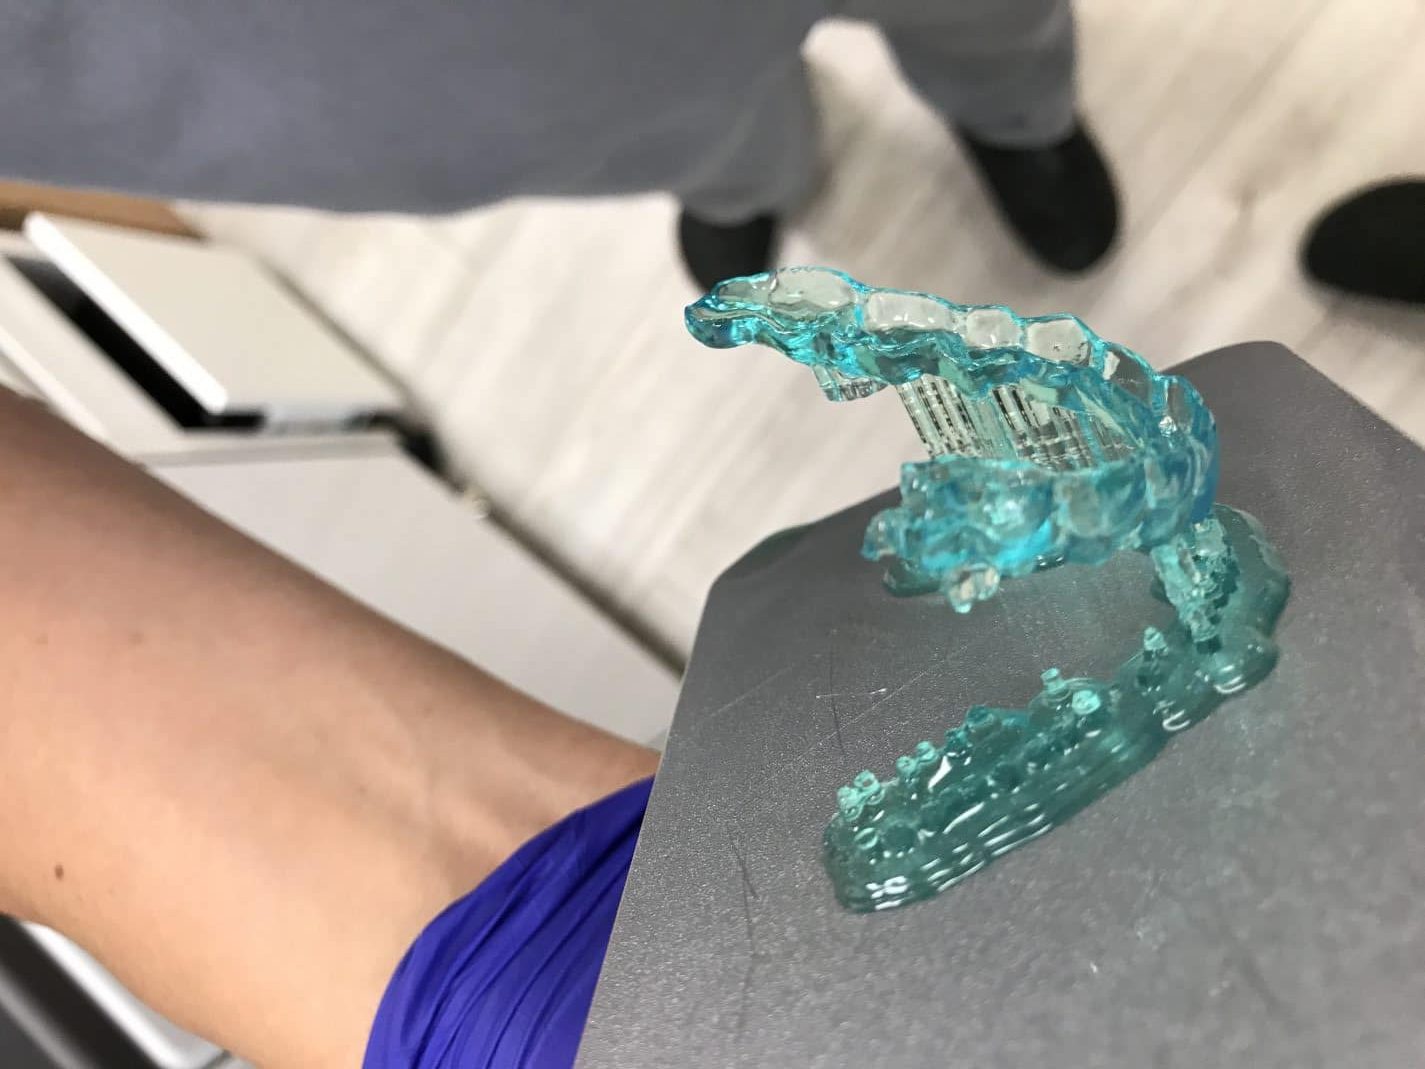
Preparing your appliances correctly to be 3D printed is a crucial part for a successful print. Dental appliances due to their organic shapes are sometimes difficult to support. We have prepared this playlist to understand how is the best way to orient and support each appliance in Print Studio.
Autodesk Print Studio is a terrific and free tool for repairing meshes, placing objets on the printing area, adding supports and finally export as STL with a reasonable file size. We show you here how to install the software and patch it for Microlay Versus.
Start downloading the installation package

Autodesk Print Studio is a great free software for repairing meshes and prepare your models for being 3D printed. It is available for Windows and Mac. In order to install it follow those steps:
- Download installer file from the Autodesk page and follow install instructions
- Download the patch script for Windows and double clic on Configure Print Studio.bat file
- Run the software and enjoy it.
Note: Print Studio isn’t compatible with later update of Windows 10 Creators
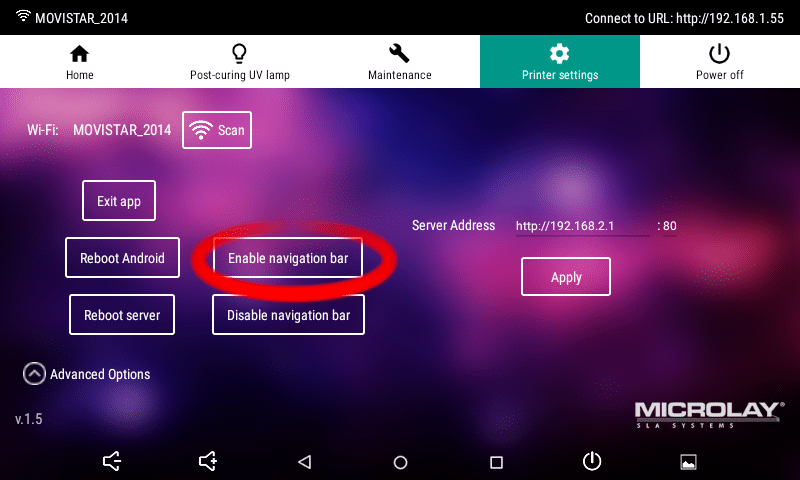
- Enable Navigation Bar: Printer Settings>Advanced Options>Enable Navigation Bar (Android will Reboot)
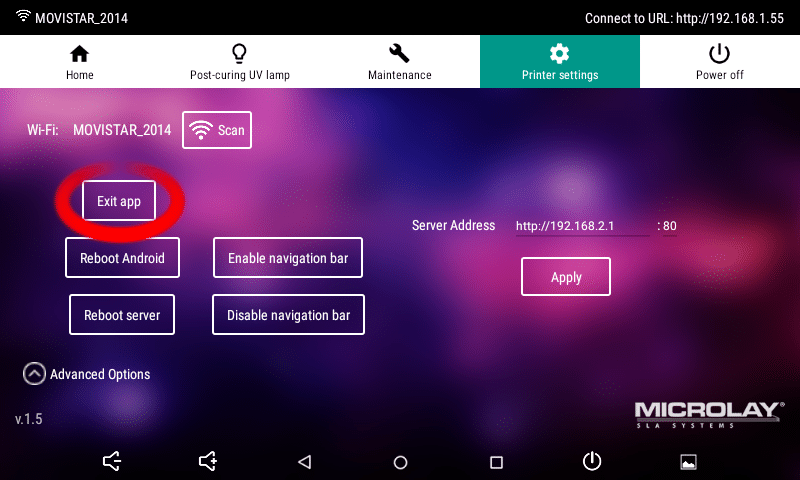
- Exit App.
- Introduce USB pendrive on the printer
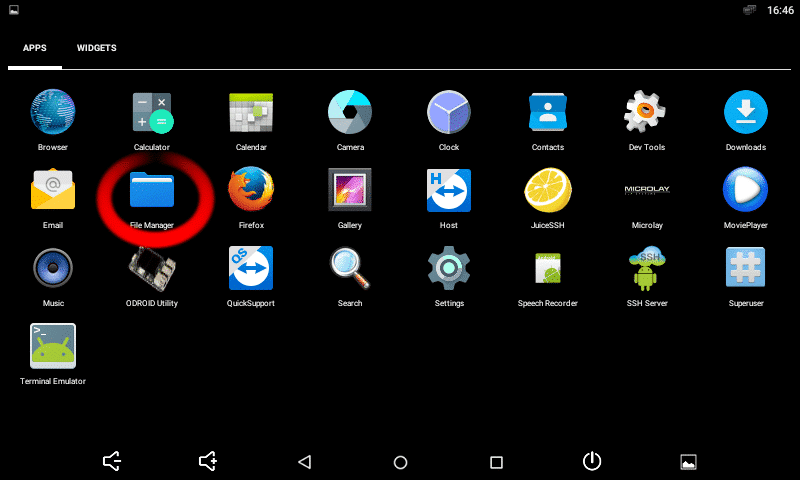
- Open File Manager app from the Android Dashboard, Clic on the upper left icon (imagen) and then on Bookmarks tab and then clic on USB Storage

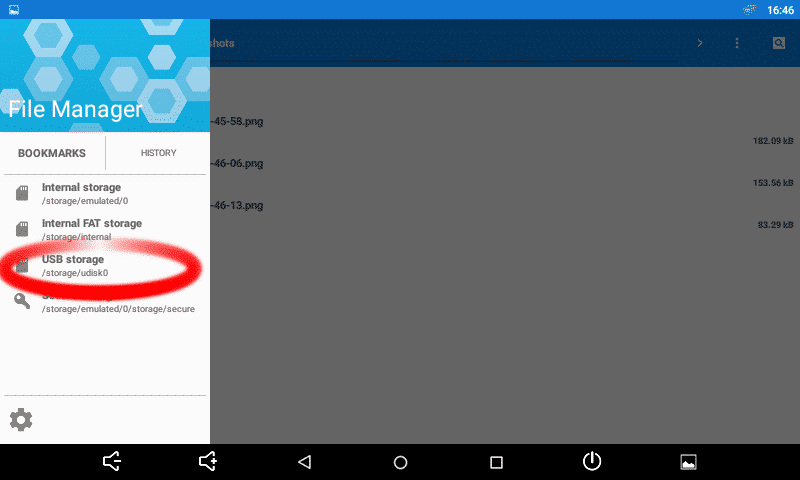
- Browse to your apk file and clic on it. Android will prompt to install the app, clic on YES, accept all permission.


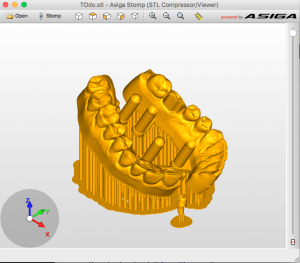
- Download and install Asiga Stomp software.
- Open Stomp and STL file.
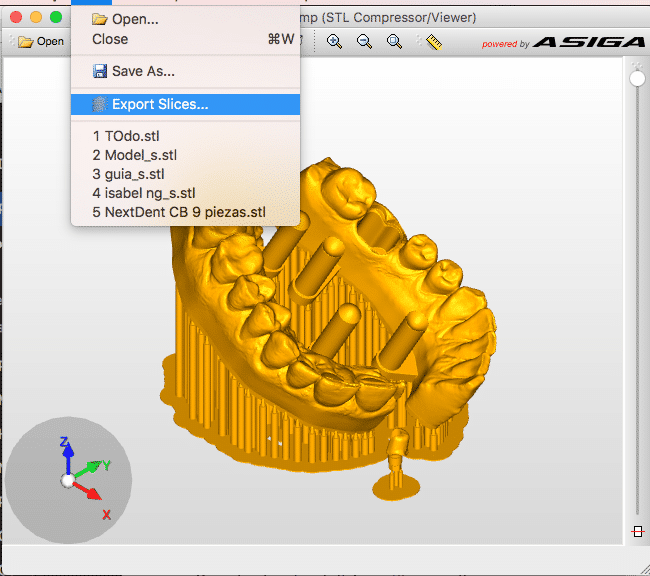
- Clic on File>Export Slices and choose a name for the file
Choose the desired layer thickness according to the profile you want to use, usually 0.05mm for 50 microns or 0.1mm for 100 microns.
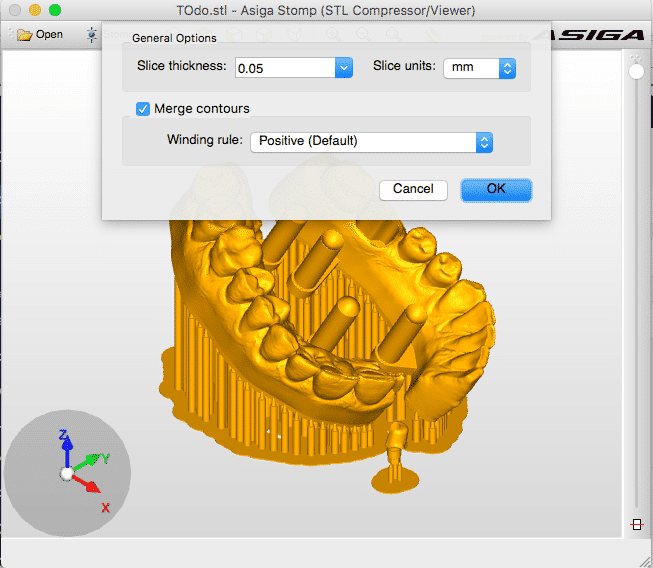
- Export SLC file, this type of file is compatible with Microlay printers.


Recent Comments