
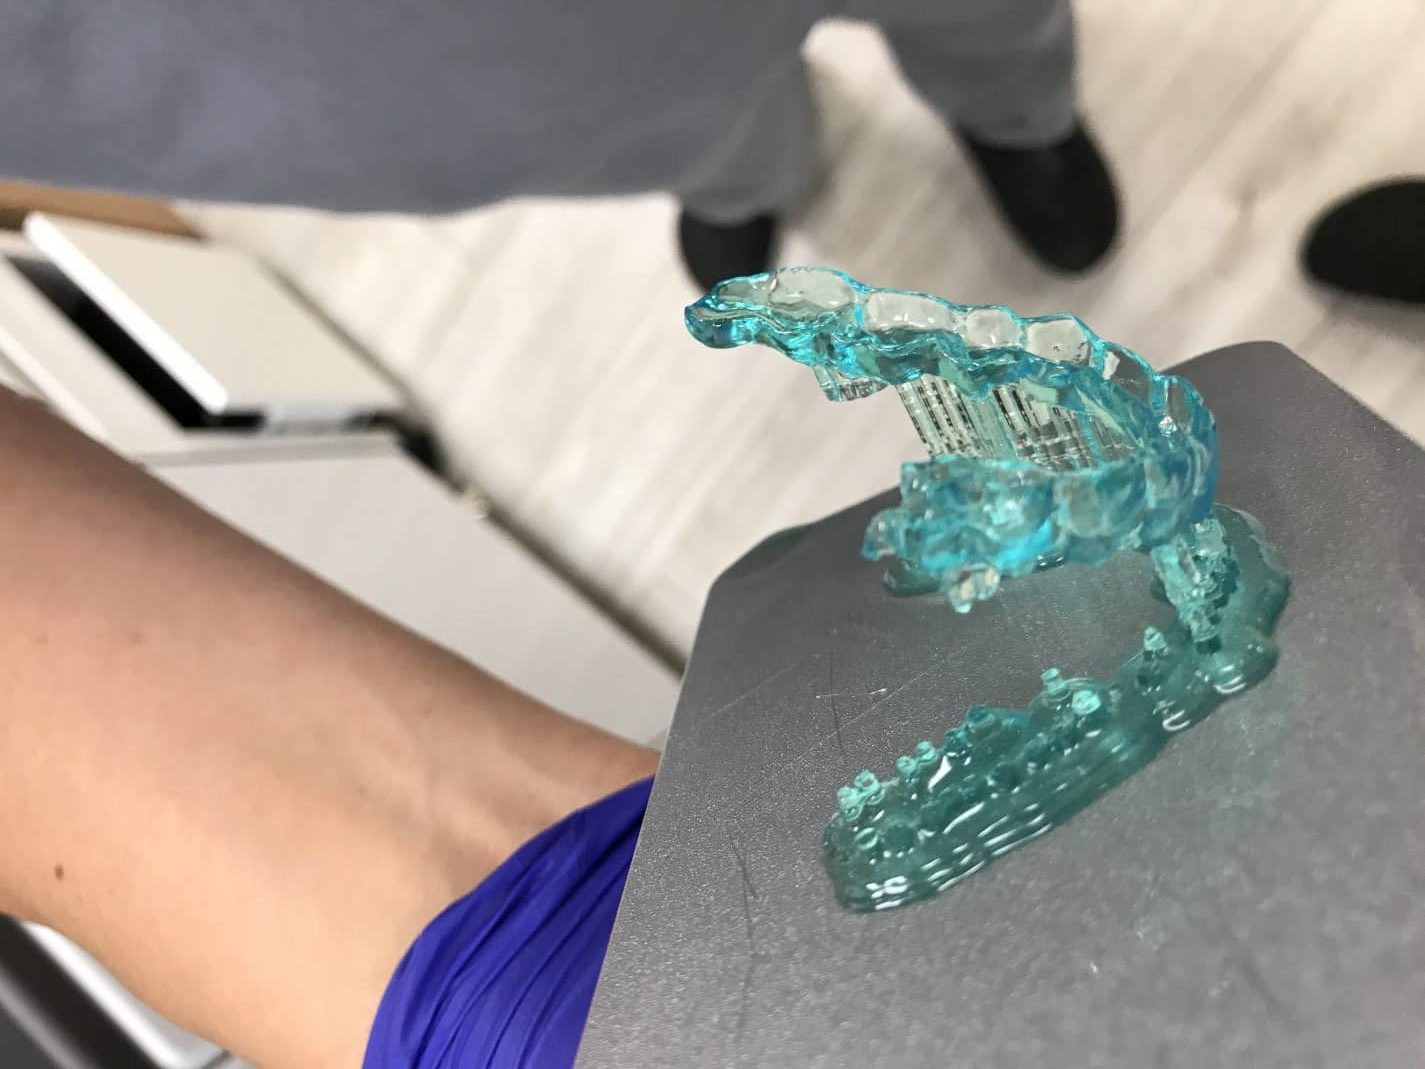
Although the handling of a 3d printer in general lines is simple, often the stress caused by the immediacy of a requirement, the lack of maintenance of the machine or even the lack of training of the operator can cause failures.
The most important thing in these cases is to carefully examine the failed print and try to find out what might have failed.
We have created a table to help you with identifying the causes of the failed print.
| Symptoms | Causes | Fixes |
|---|---|---|
| Supports were printed total or partially. The part was pulled from the supports. There are solid remains stuck on the bottom of the tank. |
INCORRECT STL PREPARATION Support tips not strong enough. Not enough support density. |
1. Clean the tank and filter the resin. 2. Use a stronger supports, increase the radius of the tip support and reinforce the lowest area of the part adding manually some more supports. |
| Nothing stuck on the platform and there are solid remains stuck on the bottom of the tank The base of the supports or part is partially detached from side of the platform Supports broken but NOT in the tip but in the post. |
Levelling problems, the platform isn't coplanar with the bottom of the tank at the begining of the print. | 1. Clean the tank and filter the resin. 2. Check that FEP film is correctly installed and touching the glass base all around. 3. Check that there are no cured resin stuck on the platform nor the bottom of the tank 4. Run a levelling wizard |
| Model partially cured, some soft parts, print failed and there are solid remains stuck on the bottom of the tank | Wrong profile (not enough curing time) | 1. Check that you have used the right profile |
| Model partially cured, some soft parts, print failed and there are solid remains stuck on the bottom of the tank | Lamp is near of its useful like (not enough lamp power) *Only in DentalFab | 1. Replace the lamp of the projector |
| Model is oversized | Wrong profile (too long curing time) | 1. Check that you have used the right profile |
| The model was printed but the height on the Z axis is much larger or shorter | Incorrect SLC file generation | 1. Check that the layer height used for the SLC file generation are equal to the profile layer height |
| Nothing stuck on the platform nor the bottom of the tank | DLP Light Engine failed Lamp/LED failure |
1. Contact your distributor |
| Holes or Fractures | Mesh issues Orientation issues Dust, fingerprints, resin leak or dirt in the light path |
Repair mesh Change orientation, here are some clues: https://microlay.com/2018/07/10/playlist-mastering-print-studio-for-microlay-versus/ Clean mirror (in case of the DentalFab), glasses and replace FEP film |
| Rashing and Ragging | Dust, fingerprints, resin leak or dirt in the light path | Clean mirror (in case of the DentalFab), glasses and replace FEP film |
| Shifting | Model prints with the layers appearing to shift back and forth, loose | Check to see if your build platform is loose Increase the supports post radius |
Preparing your appliances correctly to be 3D printed is a crucial part for a successful print. Dental appliances due to their organic shapes are sometimes difficult to support. We have prepared this playlist to understand how is the best way to orient and support each appliance in Print Studio.
Autodesk Print Studio is a terrific and free tool for repairing meshes, placing objets on the printing area, adding supports and finally export as STL with a reasonable file size. We show you here how to install the software and patch it for Microlay Versus.
Start downloading the installation package

- Download and install Asiga Stomp software.
- Open Stomp and STL file.
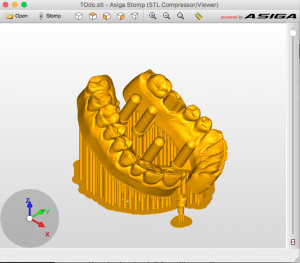
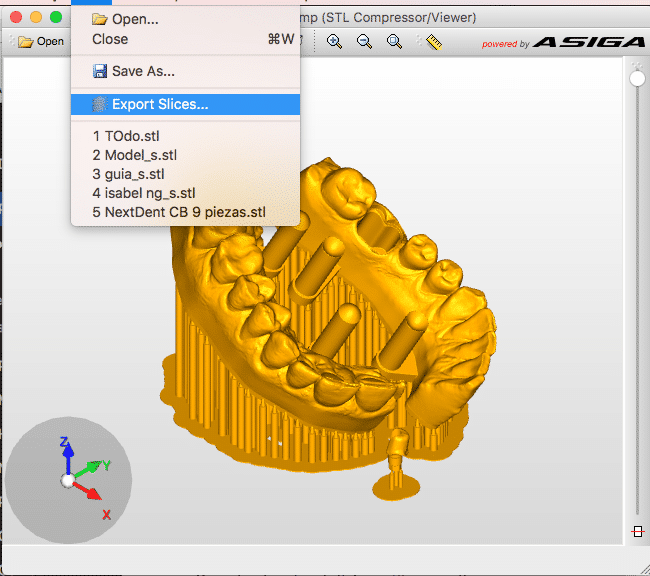
- Clic on File>Export Slices and choose a name for the file
Choose the desired layer thickness according to the profile you want to use, usually 0.05mm for 50 microns or 0.1mm for 100 microns.
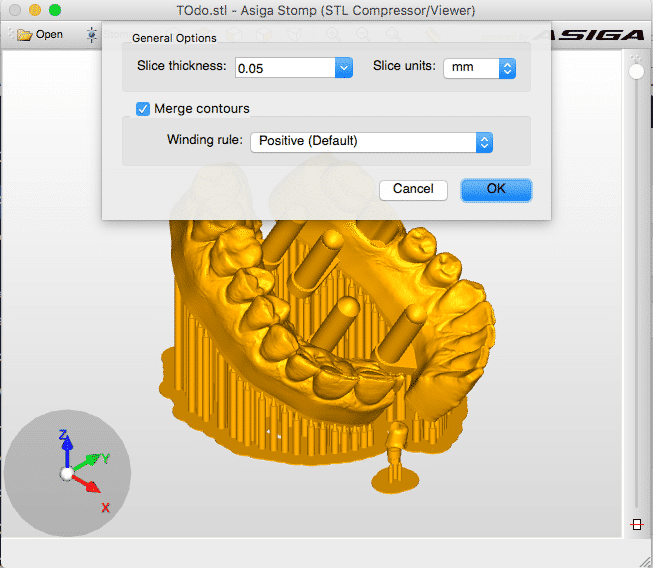
- Export SLC file, this type of file is compatible with Microlay printers.


There is some confusion regarding the differences that can be found between some models of stereolithographic or SLA 3D printers that are being introduced into the dental sector, on the one hand we have laser based printers such as Formlabs (Form 1 and Form 2) and on the other hand those that use a projector with technology DLP® or Digital Light Processing like the Microlay DentalFab. Although both use the same principle of constructing a physical model from a digital file by polymerizing (solidifying) resin with light, here the similarities end.
Print Speed
To give us an idea of how the printing system is used, we will use a comparison with something that is more familiar to us, such as printing on paper. Suppose we want to draw a square of 40mm on the side and we have a very fine marker, as thin as 140 microns, to draw the square filled with ink we will need to pass the tip of the marker both by the contour and by the filling, making a simple calculation we would need 267 passed to complete the drawing, therefore the larger the square the more passes we need to find our marker and the more time we will need to finish the drawing, this would be the case of the printer that works with a laser. In our simile, the equivalent of a DLP® projector would be to use a pad of the same size of the whole sheet of paper to draw the same square, that is to say with a single blow, this makes that the complexity of the drawing does not affect the speed at which it we are drawing, we will invest the same time in drawing a small point that in drawing a complex shape with thousands of lines.
Resolution
The resolution of a laser printer in the XY plane (our sheet in the previous example) is limited by the diameter of the laser point, ie it is virtually impossible to draw something smaller than the tip of our “marker.” If we use a projector with a resolution of 1920×1080 pixels (Full HD) and it allows us to have a resolution of 55 microns, that is to say almost 3 times better resolution than the best laser 3d printer. It is therefore possible to achieve very precise adjustments in pieces as demanding as a bridge or crown.
In addition, in a laser system, the light beam must be focused using lenses to make the point as small as possible, and this is only possible in a certain area of the printing surface, generally in the center, the more Away from the center, the printer will perform worse. This does not happen in the DentalFab where the focus is perfect on the entire surface.
Diversity of Materials:
Each resin on the market has a fine-tuned composition to polymerize when a light that possesses sufficient energy at a certain wavelength or spectrum. Lasers used in 3D printing generally have a very specific wavelength at 405nm, any resin that needs energy at a different wavelength will not be affected by this laser, therefore if the resin is not specially formulated the result will not Will be appropriate. Lamps used in the DLP projection may have peaks in more than one spectrum, both in ultraviolet and visible light and therefore much more tolerant to work with any resin. Laser-based printer manufacturers often offer their own resins optimized for their own machine, this greatly limits the real possibilities and applications of the printer, especially at a time when the appearance of new materials by a multitude of research teams .
Maintenance:
In the DentalFab the number of mechanical moving parts for printing is limited to the Z-axis motor. A laser-based system requires in addition the two laser diodes (limited life), two motors controlling the inclination of the two mirrors and one Driver to control the system. Generally the life of this system is more unpredictable and the chances of a premature failure are greater than that of a UHP lamp of the projector of the DentalFab that can be up to 10000 hours and whose cost of replacement is less than 150 € .
At Microlay we think that the dental sector demands the maximum of each technology and therefore we believe that the tools used must be up to par. The cheap in the long run is usually more expensive.



Recent Comments