Aunque el manejo de una impresora 3d en líneas generales es sencillo, muchas veces el estrés provocado por la inmediatez de una necesidad, la falta de mantenimiento de la máquina o incluso la falta de formación del operario pueden provocar averías.
Lo más importante en estos casos es examinar detenidamente la impresión fallida e intentar averiguar qué ha podido fallar.
Hemos creado una tabla para ayudarle a identificar las causas de la impresión fallida.

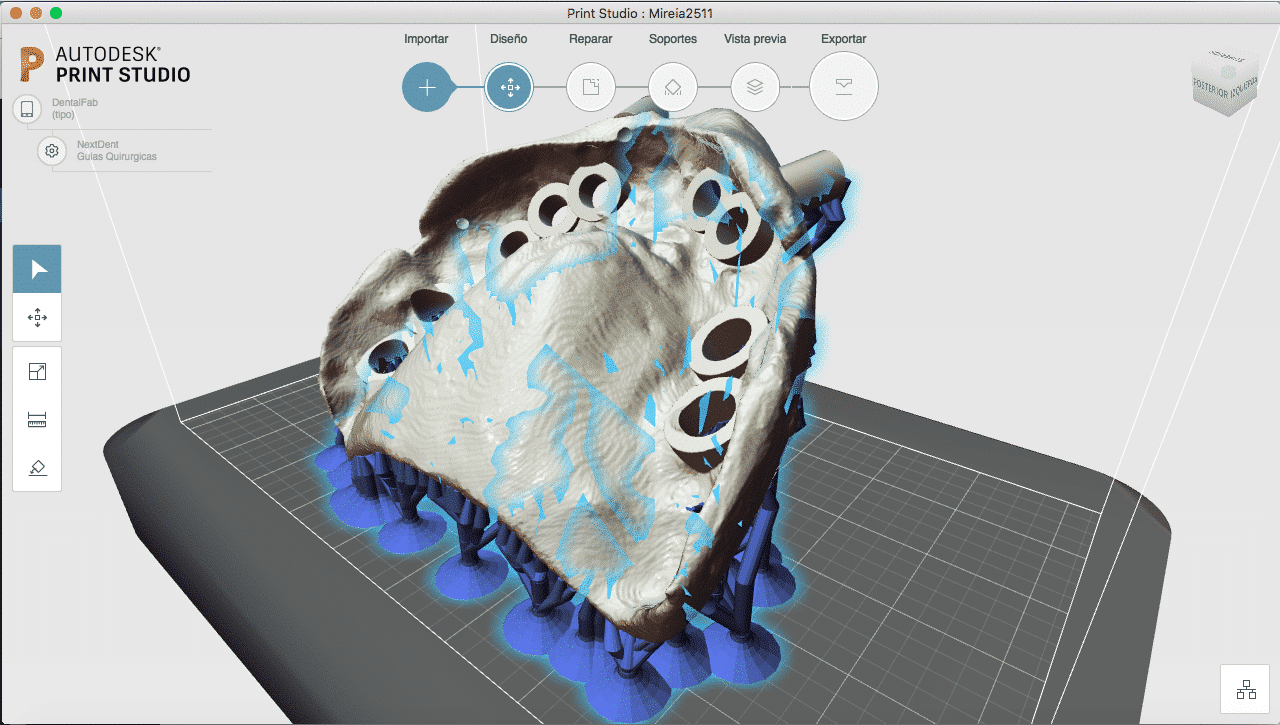
Autodesk Print Studio es un gran software gratuito para reparar mallas y preparar tus modelos para ser impresos en 3D. Está disponible para Windows y Mac. Para instalarlo siga estos pasos:
- Descargue el archivo de instalación de la página de Autodesk y siga las instrucciones de instalación.
- Descargue el script de parcheo para Windows y haga doble clic en el archivo Configure Print Studio.bat
- Ejecute el software y disfrute de él.
Nota: Print Studio no es compatible con actualizaciones posteriores de Windows 10 Creators.
Preparar correctamente los aparatos para imprimirlos en 3D es fundamental para que la impresión sea un éxito. Los aparatos dentales, debido a sus formas orgánicas, son a veces difíciles de sostener. Hemos preparado esta lista de reproducción para comprender cuál es la mejor manera de orientar y apoyar cada aparato en Print Studio.
Autodesk Print Studio es una herramienta estupenda y gratuita para reparar mallas, colocar objetos en el área de impresión, añadir soportes y, por último, exportar como STL con un tamaño de archivo razonable. Aquí te mostramos cómo instalar el software y parchearlo para Microlay Versus.
Comience a descargar el paquete de instalación

Actualmente buscamos distribuidores que deseen cooperar con nosotros.
Los candidatos a distribuidores deben tener experiencia en el campo del CAD/CAM dental y contar con los recursos, el conocimiento del campo y del producto, y el deseo de trabajar estrechamente con Microlay.
Si está interesado en recibir más información sobre cómo convertirse en distribuidor en su país, rellene este cuestionario.
No deje de visitar nuestro sitio web para obtener más información sobre Microlay y los productos que ofrecemos:

You are trying to load a table of an unknown type. Probably you did not activate the addon which is required to use this table type.
Bienvenido a WordPress. Esta es tu primera entrada. Edítala o bórrala, ¡y empieza a escribir!
Ahora con la nueva versión de Microform puedes aprovechar al máximo la altura de impresión con la nueva función de imprimir por niveles.
Desde ahora puedes duplicar la productividad de la impresora, aprovechando no sólo las horas de trabajo para imprimir sino también rentabilizando tus horas de sueño.


Recent Comments